Holter to Home
I have or will be sent a Holter to Home
Use ECG recorder
Step 1: Select your ECG recorder


Video instruction Holter H3

Package contents Holter H3

Are you soon to receive or have you or someone you know received a Holter to Home?
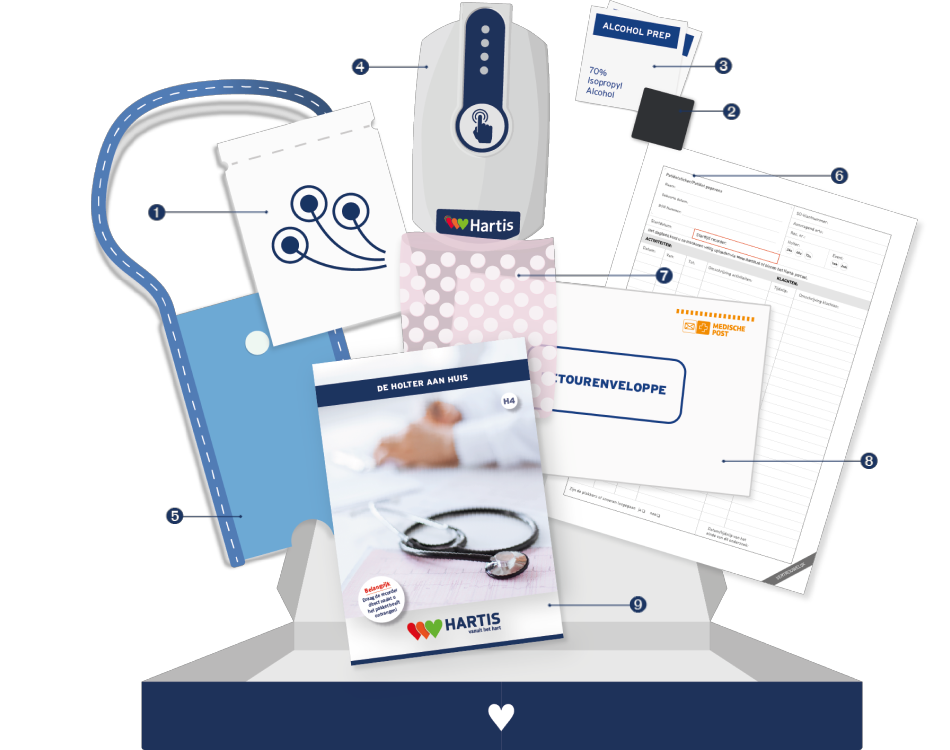
You can expect all of this in the package. Anything missing? If so, please contact our help desk at 088 - 202 46 46
- A number of sets of electrodes
- A piece of ECG sandpaper
- Alcohol pads for skin preparation
- Pre-programmed recorder
- Bag for carrying the recorder
- Activities and complaints diary
- Bag of bubble wrap
- Return envelope
- Holter to Home information leaflet
How do I apply the ECG recorder?
Step 2: Skin preparation

Before connecting the recorder, proper skin preparation is very important. Do not use body lotion or other oily agents on your body. Follow these steps:
- Make sure that there is no hair in the areas where the electrodes will be attached. If you have hair in these areas, shave it off first.
- Lightly roughen the skin with the ECG sandpaper provided. This is necessary for proper conduction.
- Degrease the skin with the alcohol pads provided. This is important for the adhesion of the electrodes.
- Make sure the skin is thoroughly dry before sticking the electrodes.
Step 3: Sticking the electrodes

- Stick the double neutral electrode to the top of the sternum.

- Stick the V1 electrode between the 4th and 5th ribs, right next to the sternum.

- Stick the V5 electrode between the 5th and 6th rib just below the chest, to the left of the sternum.

- To avoid abnormalities, it is convenient to tape the electrodes with leukoplast/plaster. Please on the underside so that the electrode + wiring remain fixed.
Step 4: Turning on the recorder
After adhering the electrodes to your body, you may put your outer clothing back on. Make sure that the transparent connector connected to the blue wire remains accessible.
Before connecting this connector to the recorder, you are responsible for turning the recorder on. To do this, press and hold the blue button for 8 seconds.

After 8 seconds, release the button and check that all five lights start blinking green at the same time. After about 15 seconds, the bottom light will briefly turn green and then this light will turn off. The recorder has now started correctly and begins recording. You can verify that the recorder has started correctly by pressing the button once.
If you see the top light on for 5 seconds, it means the recorder has started correctly.
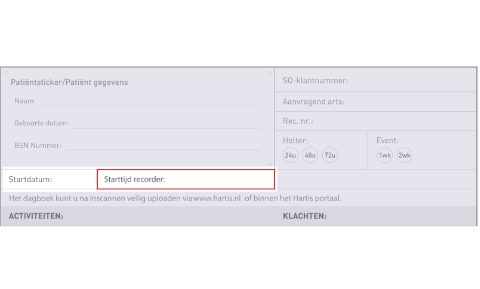
You should now indicate the start time of the recording on the journal, for example 10:20 a.m. It is also important to include the start date.
Step 5: Place recorder in disposable bag
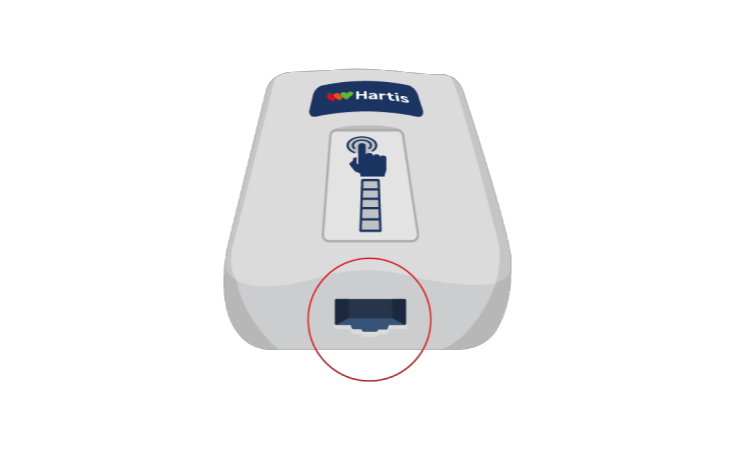
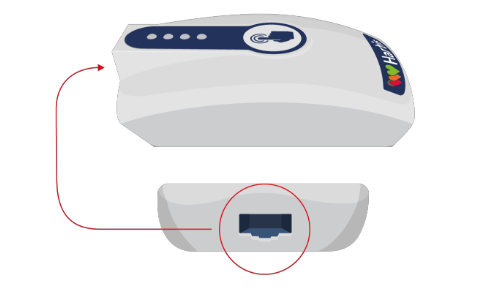
Immediately after starting the recorder, place the recorder with the connector input facing down into the blue disposable bag.
Then you connect the transparent connector of the electrodes to the recorder. You press the connector into the recorder. You will hear a clear click.
You absolutely must not shower with the recorder
When you want to shower, disconnect the recorder and remove the electrodes from your body. After showering, stick on a new set of electrodes and reconnect them to the recorder. You do not need to restart the recorder.
TIP
Mark the location of the electrodes with a ballpoint pen before detaching the electrodes. This way, you can easily replace the new electrodes in the same location after showering.
The course of the study
Step 6: Completing the diary
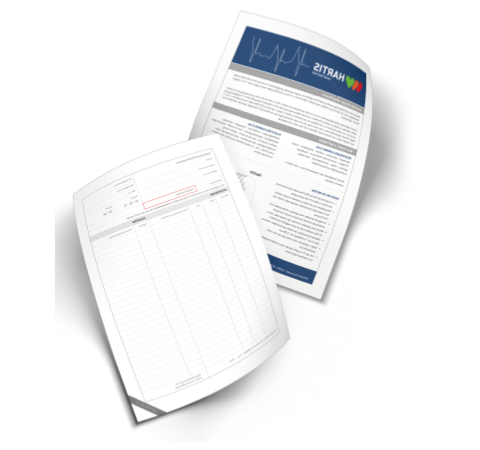
It is important that you complete the diary for the duration of the study. The diary is a loose A4 sheet (as shown here) which is in the box. Enter your activities and symptoms in the diary and return it together with the recorder (see step 7).
The diary may also be available digitally, should you find this easier. Please indicate this during the telephone conversation with a Hartis staff member.
Before Holter recording (24, 48 or 72 hours)
For this, enter your activities, in blocks of time, for example: walked from 10:00 to 11:00 and had lunch from 11:00 to 13:00. At 12:30 you have a complaint, you enter the time and description of the complaint.
For the Event recording (7 days)
For this, enter your activity only if you are also experiencing a complaint. Clearly enter the date, duration of the activity and time of the complaint. Also press the start button of the recorder. This way you indicate the moment when you experienced the complaint.
Step 7: Returning the recorder
After the recording duration ends, you may unplug the recorder yourself. You do not need to turn off the recorder. Disconnect the electrodes from the recorder and remove them from your body. You may dispose of the electrodes in the trash. Place the recorder in the bubble wrap bag and put it in the return envelope along with the completed diary (form).
Important: The package contains a return envelope in which you can return the ECG recorder to us after use. The costs for this have already been paid. All you have to do is hand in the return envelope at a PostNL point. You will then receive a Track & Trace code and you should keep it safe. Always return the recorder via Track & Trace. If you do not do this, the study may be lost and the study must be repeated. In addition, the ECG recorder provided to you for this study is an expensive medical device. If you still decide not to send the return envelope with Track & Trace and the shipment gets lost, we are unfortunately forced to charge you the cost of the ECG recorder, being EUR 795.
If you still have unopened electrode sets, please return these as well. You can contact your doctor for the results approximately one to two weeks after you return the recorder.
Video instruction Holter H4

Package Contents Holter H4
Are you soon to receive or have you or someone you know received a Holter to Home?
You can expect all of this in the package. Anything missing? If so, please contact our help desk at 088 - 202 46 46
- A number of sets of electrodes
- A piece of ECG sandpaper
- Alcohol pads for skin preparation
- Pre-programmed recorder
- Bag for carrying the recorder
- Activities and complaints diary
- Bag of bubble wrap
- Return envelope
- Holter to Home information leaflet
How do I apply the ECG recorder?
Step 2: Skin preparation
Before connecting the recorder, proper skin preparation is very important. Do not use body lotion or other oily agents on your body. Follow these steps:
- Make sure that there is no hair in the areas where the electrodes will be attached. If you have hair in these areas, shave it off first.
- Lightly roughen the skin with the ECG sandpaper provided. This is necessary for proper conduction.
- Degrease the skin with the alcohol pads provided. This is important for the adhesion of the electrodes.
- Make sure the skin is thoroughly dry before sticking the electrodes.
Step 3: Sticking the electrodes

- Stick the double neutral electrode to the top of the sternum.

- Stick the V1 electrode between the 4th and 5th ribs, right next to the sternum.

- Stick the V5 electrode between the 5th and 6th rib just below the chest, to the left of the sternum.

- To avoid abnormalities, it is convenient to tape the electrodes with leukoplast/plaster. Please on the underside so that the electrode + wiring remain fixed.
Step 4: Turning on the recorder
After adhering the electrodes to your body, you may put your outer clothing back on. Make sure that the transparent connector connected to the blue wire remains accessible.
Before connecting this connector to the recorder, you are responsible for turning the recorder on. To do this, press and hold the blue button for 8 seconds.
After 8 seconds, release the button and check if the bottom light starts blinking. After 5 minutes of blinking, the light will go out. You can check if the recorder started correctly by pressing the button once.
If you see the top light on for 5 seconds, it means the recorder has started correctly.
You should now indicate the start time of the recording on the journal, for example 10:20 a.m. It is also important to include the start date.
Step 5: Place recorder in disposable bag
Immediately after starting the recorder, place the recorder with the connector input facing down into the blue disposable bag.
Then you connect the transparent connector of the electrodes to the recorder. You press the connector into the recorder. You will hear a clear click.
You absolutely must not shower with the recorder
When you want to shower, disconnect the recorder and remove the electrodes from your body. After showering, stick on a new set of electrodes and reconnect them to the recorder. You do not need to restart the recorder.
TIP
Mark the location of the electrodes with a ballpoint pen before detaching the electrodes. This way, you can easily replace the new electrodes in the same location after showering.
The course of the study
Step 6: Completing the diary
It is important that you complete the diary for the duration of the study. The diary is a loose A4 sheet (as shown here) which is in the box. Enter your activities and symptoms in the diary and return it together with the recorder (see step 7).
The diary may also be available digitally, should you find this easier. Please indicate this during the telephone conversation with a Hartis staff member.
Before Holter recording (24, 48 or 72 hours)
For this, enter your activities, in blocks of time, for example: walked from 10:00 to 11:00 and had lunch from 11:00 to 13:00. At 12:30 you have a complaint, you enter the time and description of the complaint.
For the Event recording (7 days)
For this, enter your activity only if you are also experiencing a complaint. Clearly enter the date, duration of the activity and time of the complaint. Also press the start button of the recorder. This way you indicate the moment when you experienced the complaint.
Step 7: Returning the recorder
After the recording duration ends, you may unplug the recorder yourself. You do not need to turn off the recorder. Disconnect the electrodes from the recorder and remove them from your body. You may dispose of the electrodes in the trash. Place the recorder in the bubble wrap bag and put it in the return envelope along with the completed diary (form).
Important: The package contains a return envelope in which you can return the ECG recorder to us after use. The costs for this have already been paid. All you have to do is hand in the return envelope at a PostNL point. You will then receive a Track & Trace code and you should keep it safe. Always return the recorder via Track & Trace. If you do not do this, the study may be lost and the study must be repeated. In addition, the ECG recorder provided to you for this study is an expensive medical device. If you still decide not to send the return envelope with Track & Trace and the shipment gets lost, we are unfortunately forced to charge you the cost of the ECG recorder, being EUR 795.
If you still have unopened electrode sets, please return these as well. You can contact your doctor for the results approximately one to two weeks after you return the recorder.
FAQ
We would like to ask you to start the study immediately and connect the recorder as soon as you receive the package. This is for two main reasons:
The recorder is a valuable medical device. As long as you have the recorder in your possession unused, we cannot help and provide diagnosis to other patients. We do our best to keep care as prompt, as good as possible and as inexpensive and accessible as possible. Your cooperation is crucial in this by not keeping the recorder with you any longer than necessary. In addition, we cannot analyze your ECG if we do not have the recorder returned to us.
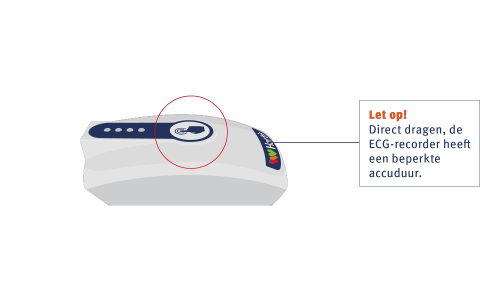
The recorder's battery discharges, this is a natural process, but unfortunately leads to the recorder being unable to be used at some point because the battery voltage is too low to complete the recording.
No, once the recorder is started the lights will blink for 15 seconds and then the bottom light will be on for another 5 seconds after which all lights will go out. If you are unsure if recorder is still working, you can press the button once. The top lamp will light briefly. Do not do this too often, you are marking a complaint in the ECG that we will look at.
You should replace the electrodes after 2 days at the latest. This is due to the conductivity and decreasing stickiness of the electrodes. You must also replace the electrodes when you shower. This is because you cannot shower with the recorder or the electrodes. We ask you to note in the diary when you change the electrodes.
The examination is reimbursed by your health insurer, but is charged by your health insurer against the legally required deductible. The exact amount varies by insurer, but on average it is around €150.